Table of Contents
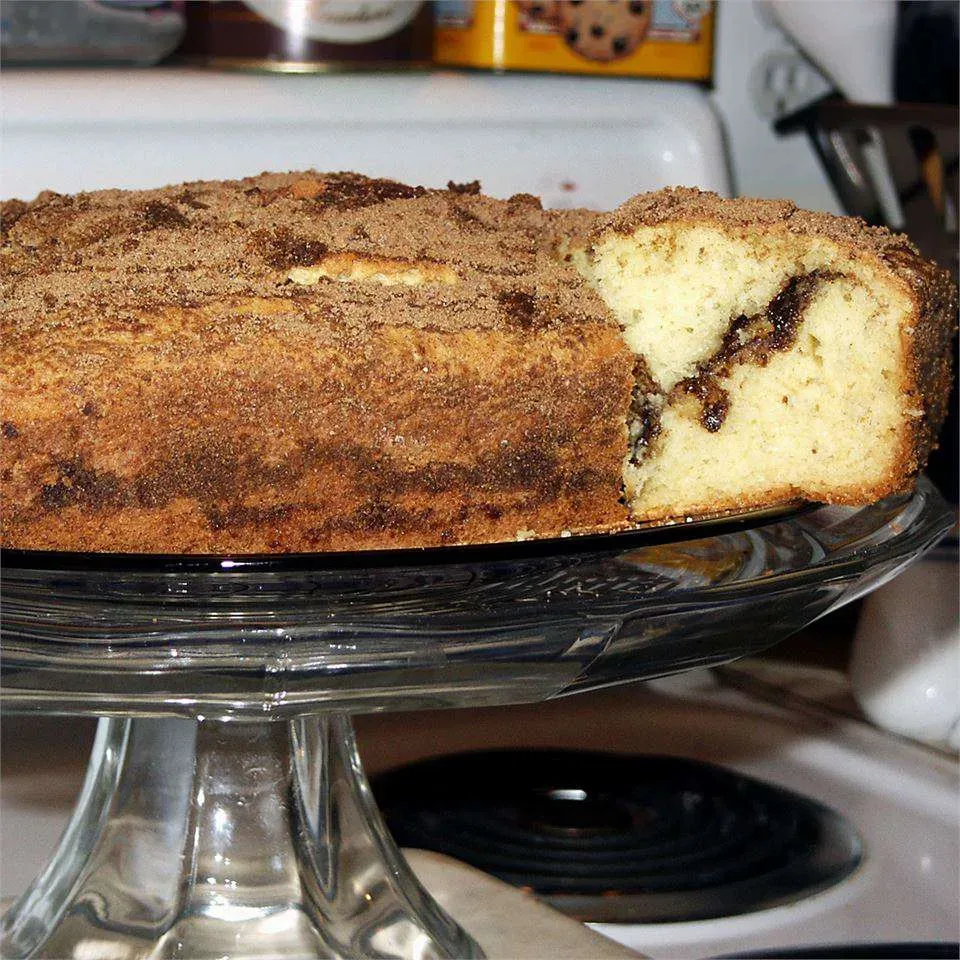
Let's be honest, few things beat a really good piece of coffee cake. It's that comforting hug in baked form, perfect alongside a mug of something warm. But if you're searching for something truly special, something that hits all the right notes of moist, tender crumb and sweet, spiced filling, you're likely thinking about the classic Jewish sour cream coffee cake.
Why Jewish Coffee Cake Holds a Special Place
Why Jewish Coffee Cake Holds a Special Place
More Than Just a Sweet Treat
Look, plenty of cultures have some version of a breakfast cake or a cake you eat with coffee. But the Jewish sour cream coffee cake? It's different. This isn't just about sugar and flour; it's got roots stretching back to Eastern Europe, evolving over centuries. Think about immigrants coming to America, bringing their recipes with them. This cake became a tangible link to home, a bit of comfort in a new, often challenging world. It wasn't fancy; it was reliable, moist, and tasted like belonging. It became a staple, a way to mark time and connect generations without needing a passport.
A Symbol of Gathering and Generosity
This cake shows up when people gather. Shabbos mornings, shiva calls, brunch with cousins, or just having a neighbor over for a chat – the coffee cake is there. It’s easy to make in a big pan, slices up nicely, and pretty much everyone likes it. Offering a slice isn't just offering food; it's offering warmth, hospitality, and a moment of shared sweetness. It’s the edible equivalent of saying, "Sit down, relax, let's talk." It carries the weight of countless conversations, shared stories, and quiet moments around kitchen tables.
Where You Might Find This Cake:
- Shabbos morning kiddush
- Family brunches
- Afternoon tea or coffee visits
- Community potlucks
- Bringing comfort to someone in need
The Magic Ingredient: Sour Cream and Its Role
The Magic Ingredient: Sour Cream and Its Role
The Secret Weapon for Tenderness and Flavor
let's talk about the real MVP of this cake: sour cream. This isn't just some dairy filler; it's the ingredient that takes this coffee cake from good to "oh my word, what's in this?" Sour cream adds a richness and tang that plain milk or yogurt just can't replicate. More importantly, its acidity tenderizes the gluten in the flour, resulting in a cake that's incredibly moist and tender, almost melting in your mouth. It also helps activate the baking soda, giving the cake a beautiful lift without drying it out. Think of it as the anti-dryness insurance policy for your bake.
Why Sour Cream Works Wonders:
- Adds moisture and richness.
- Provides a subtle tang that balances sweetness.
- Tenderizes the cake crumb for a softer texture.
- Reacts with baking soda for lift.
- Contributes to a longer shelf life (if it lasts that long).
Crafting the Batter: Key Steps and Tips
Crafting the Batter: Key Steps and Tips
Starting Strong: Creaming Butter and Sugar
Alright, let's get down to business. Making the batter for the best Jewish sour cream coffee cake isn't rocket science, but there are a few spots where things can go sideways if you're not paying attention. First up: creaming the butter and sugar. You want your butter softened, but not melted into a greasy puddle. Room temperature is key here. Beat it with the sugar until the mixture is light and fluffy. This step isn't just about mixing; you're incorporating air, which helps with the cake's texture later. Don't rush this; give it a good few minutes with your mixer until it looks pale yellow and significantly increased in volume. Think of it as building the airy foundation for your moist masterpiece.
Adding the Wet Crew: Eggs, Sour Cream, and Vanilla
Once your butter and sugar are properly fluffed, it's time for the wet ingredients. Add your eggs one at a time, beating well after each addition. This ensures they're fully incorporated and contribute to the structure. Then comes the star: the sour cream. Add it in along with the vanilla extract. Mix on a lower speed just until everything is combined. Don't overmix here. You're not trying to whip it into oblivion; you just want a smooth, homogenous mixture. This is where that tangy richness starts to integrate with the sweet base.
Key Batter Principles:
- Use room temperature butter and eggs for even mixing.
- Cream butter and sugar until light and airy for structure.
- Add eggs one at a time, mixing well after each.
- Mix in sour cream and vanilla until just combined.
- Avoid overmixing once wet ingredients are in.
Bringing in the Dry: Flour and Leavening
Now for the flour, baking soda, and baking powder. It's usually a good idea to whisk these dry ingredients together in a separate bowl first. This distributes the leavening agents evenly, preventing dreaded dense spots. Add the dry ingredients to the wet mixture in two or three additions, mixing on the lowest speed just until no dry streaks remain. Stop mixing as soon as the last bit of flour disappears. Overmixing at this stage develops gluten, which can make your cake tough. We're aiming for tender, remember? A few small lumps are fine; a tough cake is not.
Building the Swirl: Nuts, Cinnamon, and Sugar
Building the Swirl: Nuts, Cinnamon, and Sugar
Crafting the Essential Cinnamon-Nut Layer
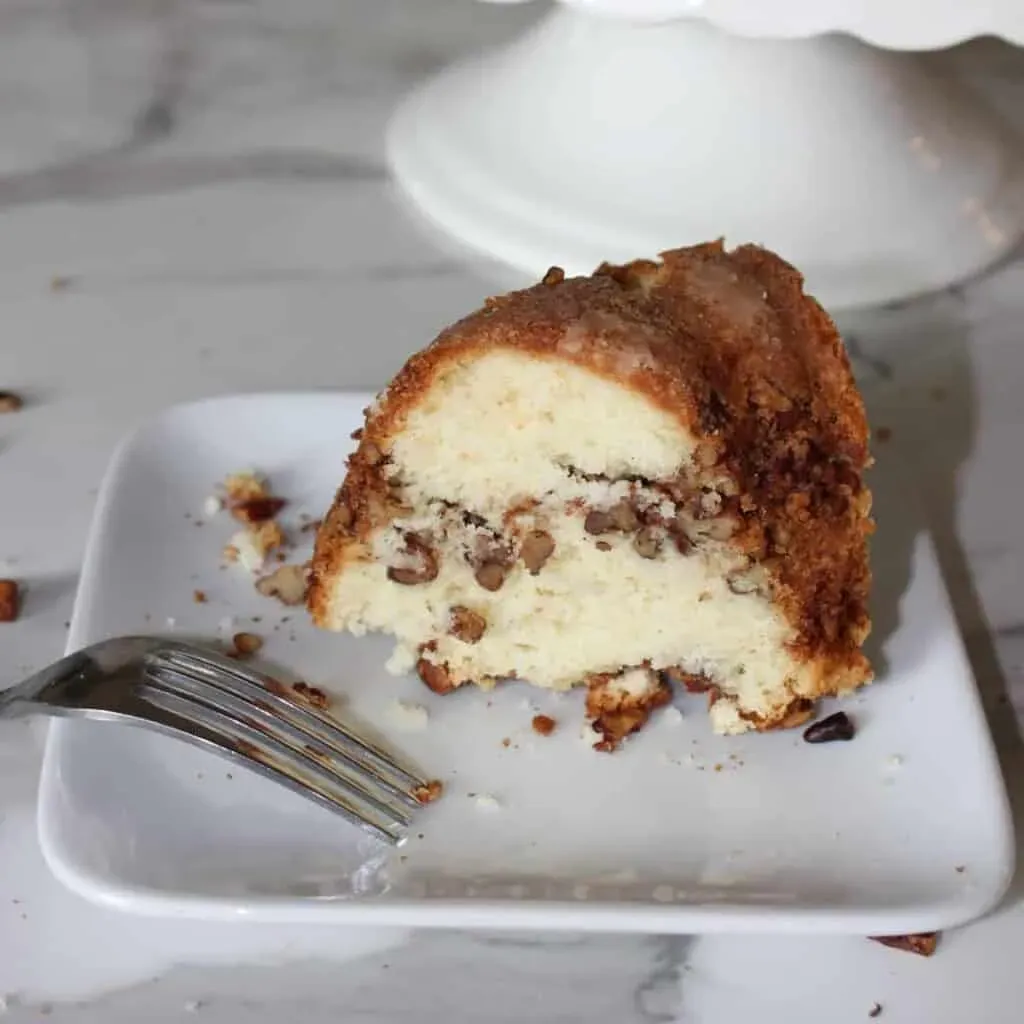
you've got your beautiful, tangy batter ready. Now comes the part that really defines this cake: the swirl. This isn't just some afterthought sprinkle; it's a substantial layer of flavor and texture running through the middle. You need chopped nuts – walnuts or pecans are traditional and work best, providing a nice crunch against the soft cake. Mix these generously with granulated sugar and a healthy dose of ground cinnamon. Some folks like to add a pinch of salt here too, which really makes the flavors pop. Don't be shy with the cinnamon; it's half the name of the game, after all. Get it all combined in a small bowl until the nuts are coated and the sugar and cinnamon are evenly distributed. This mixture is the core of the best Jewish sour cream coffee cake's appeal.
Layering for Maximum Swirl Impact
Now it's time to assemble this masterpiece. You'll want about half of your batter in the bottom of your prepared pan. Spread it out as evenly as possible. It's thick, so take your time. Then, sprinkle almost all of your cinnamon-nut mixture right over that first layer of batter. Get it right to the edges. This ensures you get that delicious ribbon of spice and crunch in every single slice. Dollop the remaining batter over the nut layer. Since it's thick, it won't spread perfectly on its own. Use a spoon or an offset spatula to gently spread it out, trying not to disturb the nut layer too much underneath. You don't need it to be perfectly smooth on top; a little rustic charm never hurt anyone. Finally, take the last bit of your cinnamon-nut mixture and sprinkle it over the very top of the cake. This creates a lovely, crisp topping as it bakes.
Elements of a Great Swirl:
- Finely chopped walnuts or pecans
- Plenty of granulated sugar
- Generous amount of ground cinnamon
- Optional pinch of salt
- Even distribution between batter layers and on top
Baking to Perfection: Temperature and Time
Baking to Perfection: Temperature and Time
Dialing in the Right Heat
you've got the batter layered with that glorious swirl. Now, don't just shove it into any old hot box. Oven temperature is critical for the best Jewish sour cream coffee cake. Most recipes call for something in the 325°F to 350°F range. Why not higher? A slightly lower temperature allows the cake to bake through evenly without the outside browning too quickly or, worse, the inside staying raw while the edges dry out. It gives that sour cream magic time to work its tenderizing wonders throughout the crumb. Preheating your oven properly is non-negotiable. Give it at least 15-20 minutes after it signals it's ready, just to be sure.
Knowing When It's Done
Baking time is always an estimate because every oven is a liar. Seriously, get an oven thermometer if you don't have one. It’s worth it. For a standard 9x13 or 9-inch square pan, you're probably looking at 50 to 70 minutes. But staring at the clock won't bake the cake. You need to look for visual cues. The top should be golden brown and firm to the touch. The edges might pull away slightly from the pan. The ultimate test? A wooden skewer or toothpick inserted into the center should come out clean. If it's got wet batter clinging to it, give it another 5-10 minutes and check again. Don't poke into the swirl layer, though; you'll just get sticky goo.
Baking Checklist:
- Preheat oven thoroughly (confirm temp with thermometer).
- Use the temperature specified in the recipe, typically 325-350°F.
- Start checking for doneness around the minimum recommended time.
- Cake should be golden brown on top and edges slightly pulled away.
- Toothpick inserted into cake (not swirl) comes out clean.
- Avoid opening the oven door too often early in baking.
The Crucial Cooling Period
You pulled it out, the skewer is clean, and your kitchen smells heavenly. Resist the urge to immediately hack into it. Cooling is a vital part of the process. Let the cake cool in the pan on a wire rack for at least 20-30 minutes. This allows the structure to set and the residual heat to finish cooking the very center. Trying to remove it or slice it too soon will result in a crumbly mess. If you're planning to invert it (less common for coffee cake, but sometimes done), do it after about 10-15 minutes. Otherwise, just let it sit there. Patience, while annoying, results in a much better slice of the best Jewish sour cream coffee cake.
Troubleshooting Common Coffee Cake Issues
Troubleshooting Common Coffee Cake Issues
When Your Cake Turns into a Crumbly Brick
you followed the steps, the kitchen smelled amazing, and then you cut into your masterpiece only to find it's drier than a stand-up comic's bad set. What happened? Usually, a dry cake points to one of a few culprits. Overmixing the batter after adding the flour is a big one; it develops gluten and makes things tough and dry. Baking at too high a temperature or for too long also sucks the life right out of it. Remember that careful creaming step? If you skipped or rushed it, you didn't incorporate enough air, leading to a denser, drier result. And yes, sometimes it's just your oven lying about its temperature.
Don't despair! If you're staring down a dry cake, you can try serving it warm with a dollop of extra sour cream (yes, more sour cream!) or even a simple glaze to add back some moisture. For next time, double-check your oven temperature with a separate thermometer, be mindful of mixing times – stop as soon as the flour disappears – and make sure your ingredients, especially the sour cream, are fresh and at room temperature before you start. Getting the best Jewish sour cream coffee cake texture relies on these small details.
Fixing Dry Cake:
- Serve warm with extra sour cream or glaze.
- Ensure accurate oven temperature.
- Do not overmix the batter, especially after adding flour.
- Use fresh ingredients at room temperature.
- Check cake for doneness at the minimum bake time.
The Case of the Sinking Swirl
You proudly sliced your cake, anticipating that beautiful ribbon of cinnamon-nut goodness, only to find it's all pooled sadly at the bottom. The dreaded sinking swirl. This usually happens for a couple of reasons. First, the filling itself might be too heavy or wet. If you added too much butter or liquid to your nut mixture, it can weigh down the batter. Second, the batter itself might be too thin or not have enough structure to support the weight of the swirl. This can happen if your leavening agents are old or you didn't cream the butter and sugar properly to build that initial airy structure we talked about.
To prevent the swirl from sinking next time, make sure your nut mixture is just nuts, sugar, and cinnamon – no extra wet stuff unless the recipe specifically calls for it (and most classic ones don't). Also, ensure your batter is thick and well-aerated from the creaming step. Some bakers swear by tossing the nuts in a tiny bit of flour before mixing them with the cinnamon and sugar; this can help them suspend better in the batter. Layering correctly, with a solid base layer of batter, is also key. You want that foundation strong enough to hold up the delicious middle layer.
Variations on the Classic Theme

Variations on the Classic Theme
Adding a Fruity Twist
so the classic best Jewish sour cream coffee cake is stellar with just the cinnamon-nut swirl. No argument there. But sometimes, you want to jazz things up a bit, right? Adding fruit is a fantastic way to do it. Blueberries are a natural fit; they burst in the oven and add little pockets of sweet-tart flavor that cut through the richness. You can stir them gently into the batter before layering or sprinkle them over the batter layers along with (or instead of) the nuts. Sliced apples or pears, tossed with a little cinnamon and sugar, also work beautifully, especially in the fall. Just don't go crazy with overly wet fruits, or you'll mess with the cake's structure. We're adding flavor, not creating a fruit soup.
Experimenting with Nuts and Spices
While walnuts and cinnamon are the standard bearers for the best Jewish sour cream coffee cake, who says you can't stray a little? Pecans offer a slightly different, perhaps richer, flavor profile. If you're feeling adventurous, try adding some toasted hazelnuts or even almonds to the mix. Just make sure they're chopped to a size that integrates well. Beyond cinnamon, consider a pinch of nutmeg, cardamom, or even a tiny bit of allspice in your swirl mixture. A little zest from an orange or lemon added to the batter can also lift the flavor profile unexpectedly. It's your kitchen; get creative, but maybe don't throw in everything at once on your first try.
Variations to Consider:
- Blueberries
- Sliced apples or pears
- Pecans, hazelnuts, or almonds
- Nutmeg, cardamom, or allspice in the swirl
- Citrus zest in the batter
Toppings Beyond the Swirl
The cinnamon-nut layer is essential, yes, but that doesn't mean you can't add *more* on top. A simple powdered sugar glaze, made by whisking confectioners' sugar with a little milk or lemon juice, adds a touch of sweetness and a pretty finish once the cake is cool. Or, if you're a texture person, a classic streusel topping – a mix of flour, butter, sugar, and sometimes oats – crumbled over the top before baking provides an extra layer of crispness and buttery flavor. It creates a multi-layered experience: tender cake, spiced swirl, and a sweet, crumbly crown. It's like giving the best Jewish sour cream coffee cake an extra fancy hat.
Serving Up a Slice of Tradition
Serving Up a Slice of Tradition
the baking is done, the house smells like heaven, and the cake is finally cool enough to slice. Serving up a slice of this best Jewish sour cream coffee cake is more than just putting cake on a plate; it's about sharing a piece of something special. Whether it’s for a casual brunch or a more formal gathering, serve it at room temperature. Chilling it can dull the flavors and affect that perfect moist texture. A simple dusting of confectioners' sugar is classic, or if you made a glaze, drizzle it on just before serving. Don't overthink it; the cake is the star. Just make sure you've got plenty of coffee or tea ready, because trust me, people will be asking for seconds.
Storing Your Delicious Creation
Storing Your Delicious Creation
Keeping Your Bake Fresh
So, you've miraculously managed not to devour the entire best Jewish sour cream coffee cake in one sitting. Good job, show-off. Now you need to keep that precious leftover slice (or slices) fresh so you can enjoy it later. The absolute best way to store coffee cake is at room temperature, assuming your kitchen isn't hotter than the surface of the sun. Wrap it tightly in plastic wrap, then maybe another layer of foil, or stick it in an airtight container. This keeps the air out, which is the enemy of moist cake. Don't just plop a plate over it; that's basically an invitation for it to dry out within hours.
If you live in a humid climate, or if your house is particularly warm, you might consider refrigerating it, but be warned: the fridge can sometimes dry out baked goods. If you do refrigerate, make sure it's wrapped extra well. Let it come back to room temperature before serving for the best texture and flavor. For longer storage, coffee cake freezes surprisingly well. Slice it first, then wrap individual slices tightly before freezing. Thaw them at room temperature. It won't be *exactly* the same as fresh-from-the-oven, but it's a pretty close second.
Storage Options Breakdown:
- Room Temperature: Tightly wrapped, 2-3 days. Best for texture.
- Refrigerated: Tightly wrapped, up to a week. Can affect texture slightly.
- Frozen: Tightly wrapped slices, up to 2-3 months. Thaw at room temp.
Wrapping Up Your Coffee Cake Quest
So there you have it. Making the best Jewish sour cream coffee cake isn't about magic or secret ingredients you can only find in a hidden bakery vault. It's about understanding how sour cream works its magic, getting that batter just right, and layering in that essential cinnamon-sugar-nut swirl. It takes a little patience, sure, but the result? A cake that actually delivers on the promise of comfort food, slice after moist, flavorful slice. Now go forth and bake something genuinely good.