Table of Contents
Ever found yourself mid-recipe, staring down a list that calls for sour cream or buttermilk, only to realize your fridge is bare? Or maybe you're just tired of the bland stuff from the store?
Ingredients and Setup for Homemade Buttermilk Sour Cream

Ingredients and Setup for Homemade Buttermilk Sour Cream
Alright, so you're ready to dive into how to make buttermilk sour cream. Forget fancy equipment or trips to specialty stores; this is gloriously simple. You'll need just two main things: some decent heavy cream and a starter culture, which can be either a dollop of store-bought sour cream or, fittingly, some actual buttermilk. The fatter the cream, the thicker your final product will be, so spring for heavy cream, not half-and-half or milk, unless you're aiming for something closer to a thin yogurt – which you probably aren't. You'll also need a clean jar with a lid. Mason jars work great; just make sure it's spotless to avoid introducing unwanted funk.
Mixing and Waiting: The Process to Make Buttermilk Sour Cream
Mixing and Waiting: The Process to Make Buttermilk Sour Cream
Combining Your Ingredients
you've got your heavy cream and your chosen starter – either a dollop of existing sour cream or some actual buttermilk. Now comes the thrilling part: mixing them together. Measure out your cup of heavy cream and about a quarter cup of your starter into that squeaky-clean jar. Don't overthink this. You're not performing complex chemistry here.
Just pour them in. Put the lid on tightly. Give it a good shake. You want everything nicely combined, the starter bacteria getting cozy with their new creamy home. A quick whisk in the jar before sealing works too if shaking feels too violent for your sensibilities.
The Initial Waiting Game
This is where the magic (read: bacterial fermentation) starts happening for your homemade buttermilk sour cream. Find a spot in your kitchen that stays relatively warm and out of direct sunlight. Room temperature is key here, typically somewhere between 70-75°F (21-24°C). If your kitchen runs cold, find a warmer spot or wrap the jar in a towel.
Leave the jar undisturbed. Seriously, don't poke it, don't jiggle it, just let it be. The bacteria in the starter need time and a stable environment to consume the lactose in the cream and produce lactic acid, which is what thickens it and gives it that signature tang. This initial waiting period is crucial.
What happens during the wait?
- Bacteria consume lactose.
- Lactic acid is produced.
- Cream thickens.
- Flavor develops.
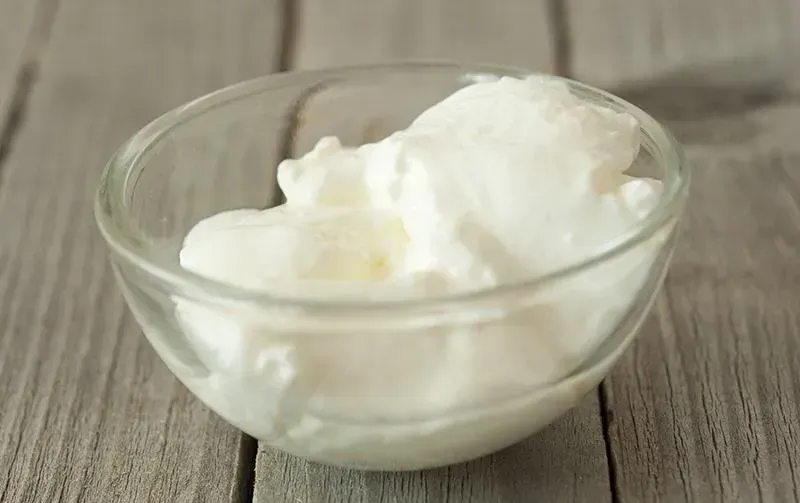
Checking for Thickness and Finishing Up
After about 24 hours of sitting out, it's time to check on your potential buttermilk sour cream. Carefully open the jar and take a look. Does it look thicker? Does it smell faintly tangy? If it's still liquidy, you might need a bit more time, especially if your kitchen is cool. Let it sit for another few hours, checking periodically.
Once it's thickened to your liking – it should be spoonable, not pourable – it's ready for its final step. Pop that jar into the refrigerator. Chilling it will halt the fermentation process and cause it to thicken even more, achieving that classic sour cream consistency. Give it several hours in the fridge before you plan to use it. This isn't instant gratification, but the result is usually worth the patience.
Storage and Shelf Life: Keeping Your Homemade Sour Cream Fresh
Storage and Shelf Life: Keeping Your Homemade Sour Cream Fresh
Into the Cold: Storing Your Sour Cream Creation
you've successfully navigated how to make buttermilk sour cream and it's looking thick and tangy. Now what? Unlike the store-bought tubs that seem to last forever (seriously, what's in that stuff?), your homemade version is a bit more... alive. It needs to live in the fridge. Period. No leaving it on the counter "just because." Once it's thickened to your liking and chilled, keep that lid on tight and store it in the coldest part of your refrigerator. This slows down the bacterial activity and keeps it from getting *too* sour or, worse, growing something fuzzy you didn't intend.
How Long Does This Goodness Last?
So, how long can you realistically expect your glorious batch of homemade buttermilk sour cream to stick around before it decides its time is up? Generally speaking, you're looking at about 7 to 10 days in the refrigerator. Think of it like milk or yogurt; it's a fresh dairy product. The tang might increase slightly over time, which is fine for some uses, but it won't last for weeks on end. Use a clean spoon every time you dip into it to prevent contamination, which is the fastest way to send it to an early grave.
How can you tell if it's past its prime?
- Any visible mold (usually fuzzy green or black spots).
- A smell that's off – beyond just tangy, think genuinely foul or yeasty.
- Separation that looks weird, not just a little liquid on top but chunky or grainy textures.
- Significant discoloration.
When in doubt, toss it out. Your stomach will thank you.
Troubleshooting Your Buttermilk Sour Cream & When to Toss It
Troubleshooting Your Buttermilk Sour Cream & When to Toss It
"Why Won't It Thicken?" - Common Issues
So, you followed the steps, gave it the required 24 hours, maybe even a bit longer, and you're staring at a jar of slightly thicker cream instead of luscious buttermilk sour cream. What gives? Usually, it comes down to temperature or the starter. If your kitchen is too cold, the bacteria slow down, or worse, go dormant. They need that cozy 70-75°F range to really get to work. Another culprit could be your starter. Was your buttermilk or sour cream past its prime? Did it have active cultures? Sometimes a starter is just weak. Try using a fresh starter or finding a warmer spot for your jar.
Another possibility is the cream itself. While heavy cream is best, sometimes ultra-pasteurized cream has been heated so high it affects how it cultures. Look for pasteurized heavy cream if you can find it. If it's still not thickening after 36-48 hours in a warm spot with a good starter, it might be a lost cause for that batch.
Troubleshooting Checklist:
- Is the room temperature warm enough (70-75°F)?
- Is your starter (buttermilk or sour cream) fresh and active?
- Did you use heavy cream, not lighter milk or half-and-half?
- Is your cream ultra-pasteurized? (May be harder to culture)
Off Smells or Flavors: What's Normal, What's Not?
Your homemade buttermilk sour cream should smell tangy, pleasantly acidic, like good yogurt or, well, sour cream. It might have a slightly yeasty smell initially, which is often fine, but it shouldn't smell foul, rotten, or strongly alcoholic. A little separation is normal; you might see a layer of whey on top, which you can stir back in. But if the liquid is cloudy or bubbly, that's a bad sign.
Taste-wise, it should be tart, but clean. If it tastes bitter, intensely alcoholic, or just plain wrong, something went awry. Off-flavors can come from contamination (did you use a clean jar?), using expired starter, or culturing for too long at too warm a temperature, allowing undesirable bacteria to take over.
When to Admit Defeat: Tossing Your Batch
Look, sometimes things just don't work out. It stinks to waste ingredients, but food safety is paramount. Your batch of homemade buttermilk sour cream is done for and needs to be tossed if you see any visible mold. Period. Green, black, fuzzy, white spots – if it's mold, it goes in the trash. If it smells truly awful, like something rotten or strongly chemical, don't taste it; just toss it. If the texture is weirdly separated, chunky, or slimy beyond normal whey separation, that's another red flag. Trust your senses. If it looks wrong, smells wrong, or tastes wrong, it's not worth the risk.
Signs it's time to toss:
Sign | Description |
|---|---|
Visible Mold | Any fuzzy or colored spots (green, black, white). |
Foul Odor | Smells rotten, chemical, or intensely alcoholic. |
Abnormal Texture | Excessive chunkiness, sliminess, or bubbly separation. |
Bad Taste | Bitter, extremely off, or unpleasant flavor. |
Don't try to salvage it. Start fresh with clean equipment and new ingredients. Learning how to make buttermilk sour cream involves a little trial and error sometimes.
The Tangy Payoff
So there you have it. Making buttermilk sour cream at home isn't some culinary Mount Everest; it's a straightforward process involving little more than mixing, waiting, and keeping an eye on things. You trade convenience for control over texture and flavor, ending up with a product that tastes distinctly more vibrant than its store-bought cousins. Whether you're dolloping it onto chili, stirring it into a cake batter, or using it as a base for a dip, you now have the ability to create this versatile ingredient yourself. It might not change the world, but it will definitely improve your next batch of biscuits.