Table of Contents
Ever had a treat that's both nostalgic and incredibly refreshing? I'm talking about those delightful, icy tubes of goodness: Mexican ice cream in a plastic bag, also known as Bolis! Forget fancy cones and messy scoops, these frozen delights are a staple in Mexican households, especially when the sun is blazing. Growing up, my summers were filled with the joy of slurping these homemade treats, each flavor a little adventure. Now, I'm going to share with you not just what makes these Bolis so special, but also a family recipe that's been passed down through generations. We'll start with understanding what exactly these ice cream bags are, then move onto the star of the show—my family's go-to recipe. I’ll walk you through every step, from mixing the ingredients to tying off those little bags. Plus, I'll throw in some fun flavor ideas and tips to make your Bolis the best on the block. Get ready to create some frozen magic; it's easier than you think, and trust me, the result is pure bliss.
What are Mexican Ice Cream Bags (Bolis)?
What are Mexican Ice Cream Bags (Bolis)?
The Coolest Treat on the Block
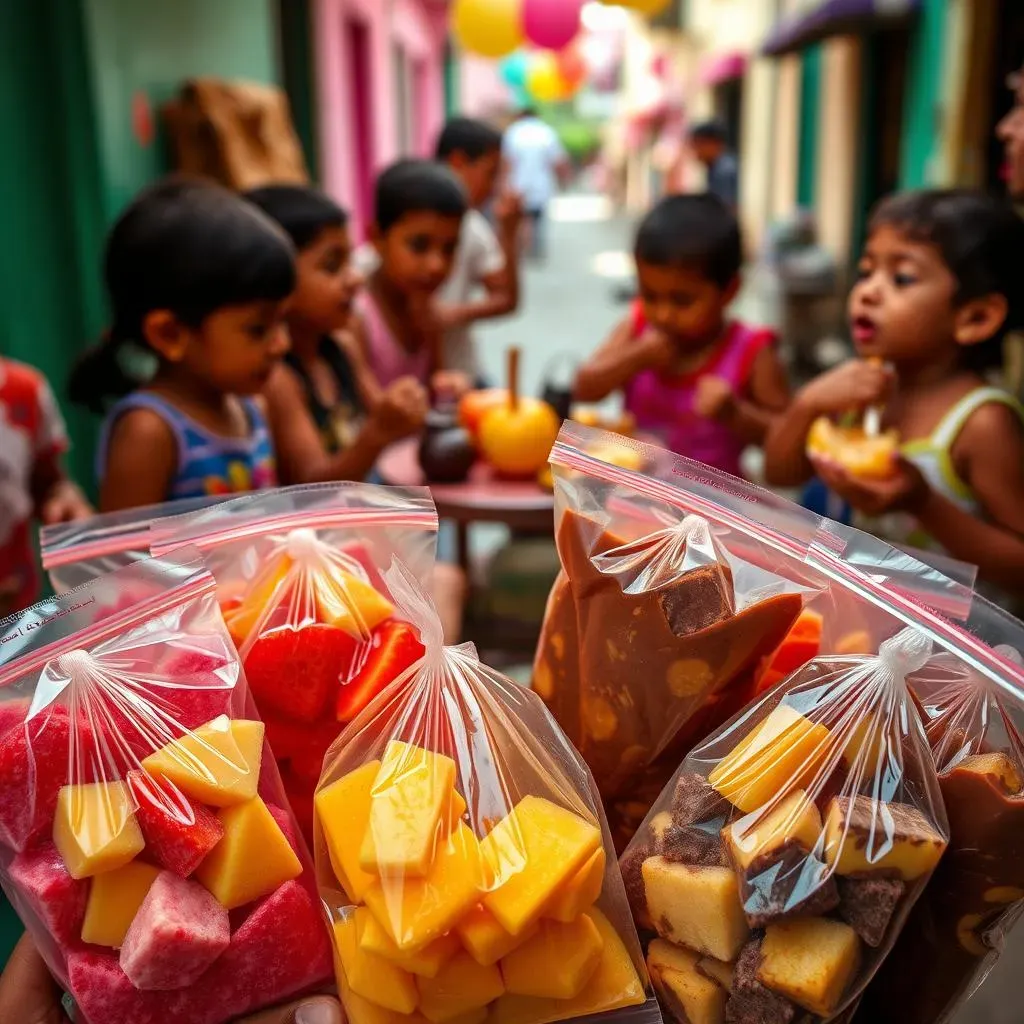
so you're wondering, "What exactly are these Bolis everyone's talking about?" Well, imagine a popsicle, but instead of being on a stick, it's frozen inside a small plastic bag. That's pretty much it! They're super popular in Mexico and are known by different names depending on where you are. Some folks call them "hielitos," others "cubitos," but the idea is always the same: a refreshing, frozen treat that's easy to eat and even easier to love. It's like a portable ice cream party in your hand.
These aren't your typical store-bought pops. Bolis are usually homemade, which means you can find all sorts of awesome flavors, from classic strawberry to creamy Nutella. They're not just a dessert, they're a whole cultural experience! I remember as a kid, the anticipation of waiting for them to freeze was almost as fun as eating them. And the best part? You can customize them to your liking, which is something you just can't do with those boring grocery store pops.
A Little History Lesson
The beauty of Bolis lies in their simplicity. They are a way to make a delicious, cooling treat without needing a lot of fancy equipment. It is said that they came about as a way to make ice cream accessible to everyone, and the use of small plastic bags was a practical and inexpensive method. Families would make huge batches of these during the hot months, and they were a hit at parties and gatherings. They are a testament to how a simple idea can turn into a beloved tradition.
Name | Region | Description |
|---|---|---|
Bolis | Widespread | Common name for frozen treats in bags |
Hielitos | Various regions | Translates to "little ice," another common name |
Cubitos | Some regions | Means "little cubes," referring to their shape |
More Than Just a Frozen Snack
What I love most about Bolis is that they are more than just a frozen snack. They are a memory, a piece of home, and a way to share joy with others. In many Mexican communities, making Bolis is a family affair, with everyone pitching in to mix, fill, and freeze. It’s a great way to teach kids about cooking and about the importance of spending quality time together. And let's be honest, who doesn't love a cold, sweet treat on a hot day? Bolis are pure, unadulterated happiness in a bag.
My Family's Secret Recipe for Mexican Ice Cream in a Bag
My Family's Secret Recipe for Mexican Ice Cream in a Bag
The Heart of Our Bolis: The Base
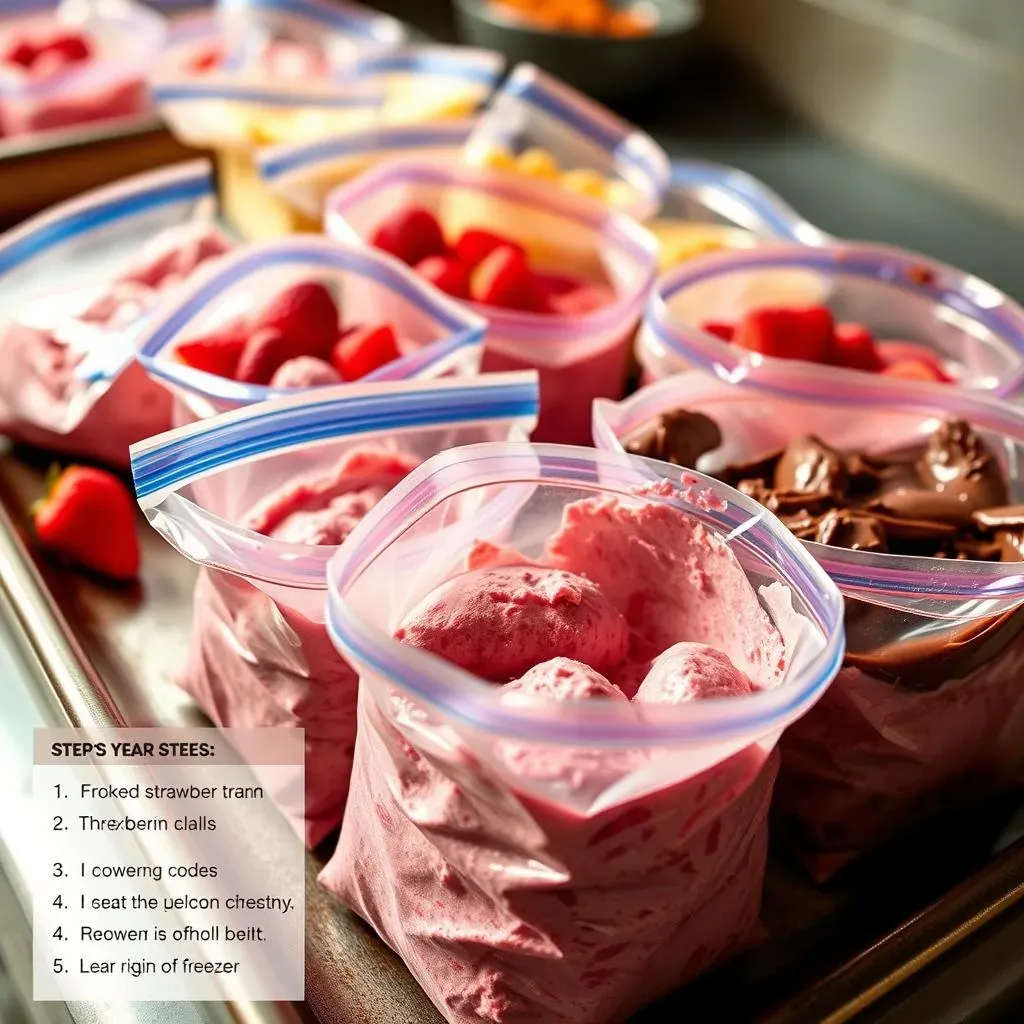
Alright, so you want in on the family secret? It all starts with the base, the foundation of every amazing Boli. My grandma, bless her heart, always said that a good base is half the battle. And she was right! We don’t mess around with just plain milk; instead, we go for a mix of dried milk, evaporated milk, and condensed milk. This combo is what gives our Bolis that creamy, rich texture that's just out of this world. It's like a velvet hug for your taste buds. The dried milk adds a depth of flavor, while the evaporated and condensed milk bring the smoothness and sweetness that makes it irresistible. Forget any watery, icy popsicles; these are creamy dreams in a bag.
The secret to getting this base perfect is all about the order and the temperature. First, you need to mix the dried milk with warm water until it dissolves completely, no lumps allowed! Then you gently stir in the evaporated milk, followed by the condensed milk. I know, it sounds simple, but it's the little things that make a big difference. The key is to make sure everything is well combined, creating a smooth, luscious mixture. This base is so good, I could drink it straight, but where's the fun in that? We need to get them in bags and frozen, pronto!
Flavor Explosions: Strawberry and Nutella
Now, let’s talk about flavors. While you can get creative with anything, our two family favorites are strawberry and Nutella. For the strawberry, we don’t just use any old syrup. We make a homemade strawberry pulp that's bursting with fresh, fruity goodness. It's a bit of extra work, but trust me, it’s worth it. We cook fresh or frozen strawberries with a bit of sugar, vanilla, and a splash of lemon juice. Then we puree it and strain out the seeds for the smoothest texture. This is what makes our strawberry Bolis taste like a summer day in a bag. The lemon juice adds a little zing to the sweetness, making it a flavor explosion in your mouth.
For the Nutella lovers (and let's be real, who isn't?), we simply mix a generous amount of Nutella into a portion of the base. The key here is to make sure the Nutella is fully incorporated, leaving no clumps behind. The result is a creamy, chocolatey, hazelnut delight that’s perfect for those with a sweet tooth. It's like a frozen version of your favorite chocolate spread, but even better. Sometimes I like to add a little extra chocolate powder just to make it extra intense. It's all about the balance of creamy and sweet, with a touch of decadence.
Ingredient | Strawberry Bolis | Nutella Bolis |
|---|---|---|
Base Mixture | Yes | Yes |
Strawberry Pulp | Yes | No |
Nutella | No | Yes |
Chocolate Powder | Optional | Optional |
StepbyStep: Making Your Own Mexican Ice Cream in a Bag
StepbyStep: Making Your Own Mexican Ice Cream in a Bag
Getting Started: The Assembly Line
so you've got your base ready, your strawberry pulp is looking vibrant, and the Nutella is calling your name. Now comes the fun part – filling those little bags! You'll need small plastic bags, about 8x26 cm, or whatever size you can find, they don't have to be exact. I always set up a little assembly line: one bowl of the base, one of strawberry goodness, one with Nutella, and a stack of bags ready to go. It's like a mini factory, but way more delicious. The key here is to not overfill the bags; leave some space at the top so you can tie them off without making a mess. Aim for about 3/4 full, that way you will avoid the disaster of a pop exploding in the freezer. Trust me, I’ve been there, it's not pretty.
Grab a bag, and using a small cup or a spoon, carefully pour in your chosen flavor. If you're going for the strawberry, remember to give the pulp a good stir first. For the Nutella, it's best to pour the base first, then the Nutella, so it mixes a little as you fill. Once you've filled the bags, gently squeeze out any extra air and tie the top tightly. A double knot is always a good idea to prevent any leaks. I like to think of this step as securing the deliciousness inside, like a tiny frozen treasure. And there you have it, your very own homemade Bolis, ready for their deep freeze transformation. It's a simple process, but it's the care you put in that makes all the difference.
Step | Action | Tip |
|---|---|---|
1 | Set up assembly line | Organize base, flavors, and bags |
2 | Fill bags 3/4 full | Don't overfill, leave space for tying |
3 | Remove air and tie | Double knot to prevent leaks |
The Waiting Game: Freezing Your Bolis
Now, this is where patience comes in. Once your bags are tied, it's time to transfer them to the freezer. I like to lay them flat on a baking sheet to ensure they freeze evenly. It's important to make sure they're not stacked on top of each other, or you might end up with some oddly shaped Bolis. Think of it as giving them their own little space to chill out. The freezing process usually takes a few hours, depending on your freezer. I always tell myself that the wait will be worth it, and it always is. I usually check them after 3 hours, and if they feel firm, you're good to go. But if you're not in a hurry, leaving them overnight is the best way to ensure they are solid, frozen goodness. It's like a little surprise waiting for you in the freezer.
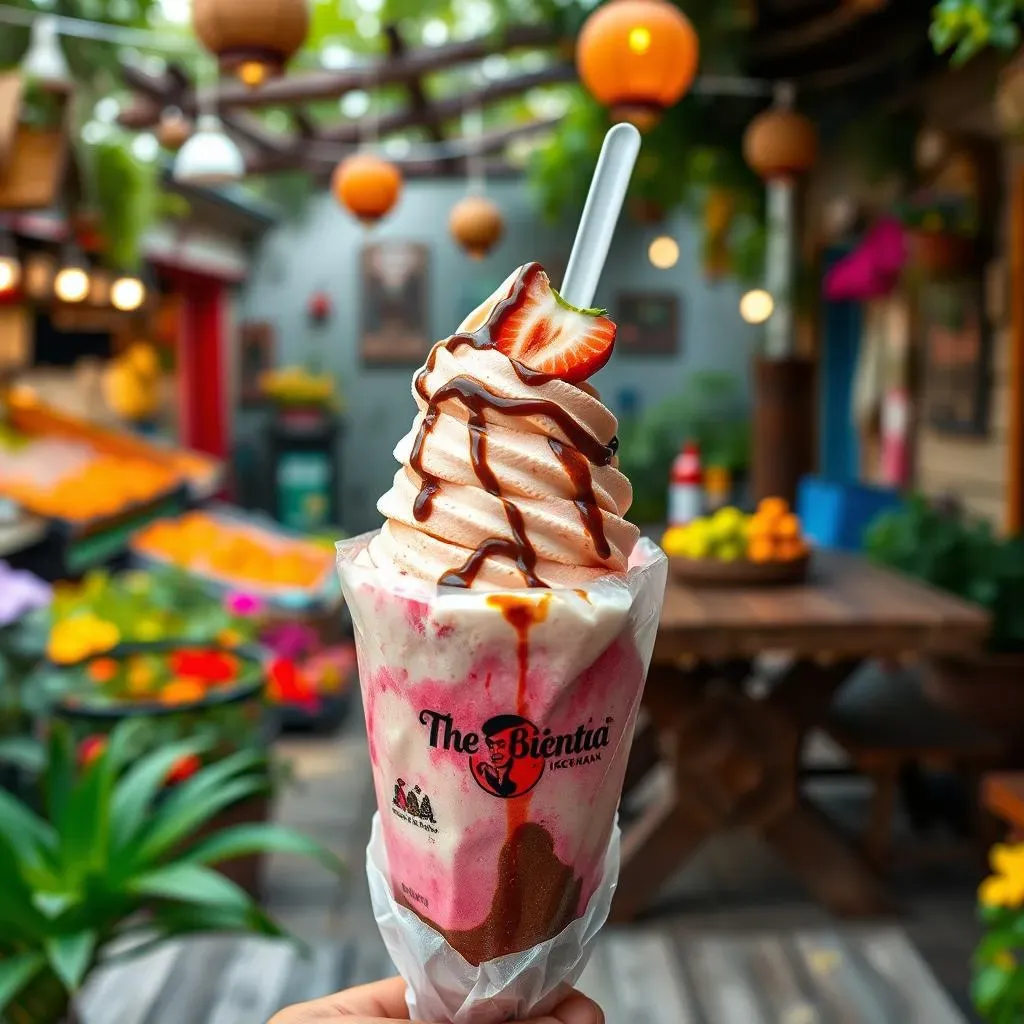
Once they are frozen solid, they are ready to enjoy. The best part is when you take them out of the freezer and you see the icy goodness inside, it's like a little victory. To enjoy your Bolis, you can simply cut open one end of the bag and push the frozen goodness up. I sometimes like to massage the bag a little before opening it to soften it up a bit. It's like a little ritual before the flavor explosion. And there you have it, your very own homemade Mexican ice cream in a bag, ready to cool you down and make you smile. It’s a simple treat, but it’s the little details that make it so special.
"The best things in life are often the simplest, like a homemade Boli on a hot day." - My Grandma
Flavor Ideas and Tips for the Best Mexican Ice Cream Bags

Flavor Ideas and Tips for the Best Mexican Ice Cream Bags
Get Creative: Flavor Combinations
so you've mastered the base, and maybe you’ve even nailed the strawberry and Nutella combo. But why stop there? The beauty of Bolis is that you can experiment with endless flavors. Think about your favorite desserts, and then imagine them frozen in a bag. For the fruit lovers, try mango with a pinch of chili powder for a sweet and spicy kick, or maybe a creamy coconut with a hint of lime. If you're feeling adventurous, try a coffee flavor with a little cinnamon, or even a cookies and cream version. I once made a peanut butter and banana Boli that was surprisingly delicious! Don't be afraid to mix and match, that's where the real fun begins. I always say that the best Bolis are the ones that surprise you with their unique flavor.
Another great idea is to use up leftover ingredients. Got some extra fruit from a smoothie? Blend it up and turn it into a Boli. Have some leftover chocolate sauce from your ice cream sundae? That'll work too! The possibilities are truly endless. And if you are feeling fancy, add some toppings into the bags before freezing. Things like mini chocolate chips, crushed cookies, or even a swirl of caramel can elevate your Bolis to the next level. Just be sure to consider the texture, you don't want anything that will get too hard or gritty when frozen. It's all about having fun and making something that you will truly enjoy. So go on, get creative, and let your taste buds guide you!
Flavor Idea | Description |
|---|---|
Mango Chili | Sweet mango with a spicy kick |
Coconut Lime | Creamy coconut with a hint of lime |
Coffee Cinnamon | Rich coffee flavor with warm cinnamon |
Cookies and Cream | Crushed cookies in a creamy base |
Pro Tips for Perfect Bolis
Alright, let’s get down to the nitty-gritty. Making Bolis is pretty straightforward, but there are some pro tips that can make all the difference. First, always make sure your base is smooth and lump-free. Nobody wants a grainy Boli. If you're using fresh fruit, make sure to puree it well and strain out any seeds or fibers. This will give you a smoother texture. Also, when you are filling the bags, try using a funnel or a measuring cup with a spout to avoid spillage. It makes the whole process a lot cleaner, trust me. And most importantly, don't overfill the bags. Leave enough room at the top to tie them off without creating a frozen explosion.
Another tip is to lay your filled bags flat on a baking sheet when you put them in the freezer. This will help them freeze evenly and prevent them from getting misshapen. You can also try freezing them in different positions to see if you get a specific shape you enjoy. And lastly, be patient. Don’t try to rush the freezing process. Let them freeze solid before you try to eat them. The wait is always worth it. These are just a few things I've learned over the years of making Bolis. They are simple, but they make a big difference in the final product. So now, armed with these tips, you're ready to make some truly amazing Bolis.
“The secret ingredient is always love… and maybe a little extra condensed milk.” - My grandma
Troubleshooting and Storage
Even with the best tips, sometimes things can go a little sideways. If your Bolis are coming out too icy, it could be that your base isn’t rich enough. Try adding more condensed milk or a bit of heavy cream to make it creamier. If they are too sweet, add a pinch of salt or a squeeze of lemon juice to balance it out. If you are having trouble tying the bags, try using small rubber bands or clips to secure them. And if you are still struggling, don't be afraid to ask for help. Making Bolis is a family affair, after all. And when it comes to storage, once they are frozen solid, you can store them in a freezer bag or container. They will last for a few weeks, but honestly, they never last that long in my house.
One last thing, don't be afraid to experiment. The best way to learn is by doing. Try different flavor combinations, different ingredients, and different techniques. You never know when you'll stumble upon your new favorite Boli recipe. And most importantly, have fun with it. Making Bolis should be a joyful experience. It's about spending time with family, creating delicious treats, and making memories that will last a lifetime. So go ahead, grab your ingredients, put on some music, and let's make some Bolis. You won't regret it!
Wrapping Up Your Mexican Ice Cream Bag Adventure
So, there you have it! Making your own Mexican ice cream in a plastic bag isn't just about creating a tasty treat; it's about embracing a tradition, having some fun in the kitchen, and maybe even making some new family memories. From the creamy base to the endless flavor possibilities, Bolis are a fantastic way to cool down and bring a little bit of Mexico into your home. Whether you stick with my family's classic recipe or venture out with your own wild flavor combinations, I hope you enjoy every icy, delicious bite. Now, go ahead and fill those bags and get ready for some frozen fun!